Sunday, November 28, 2010

FTU TUTORIAL - MERRY LITTLE CHRISTMAS


I wrote this tutorial for those with a working knowledge of PSP
Any resemblance to another tutorial is purely coincidental


Supplies:

Template by Vaybs, which you can download HERE
Gorgeous Freebie Scrap Kit, Holly Jolly Xmas , by Vaybs, which you can download HERE
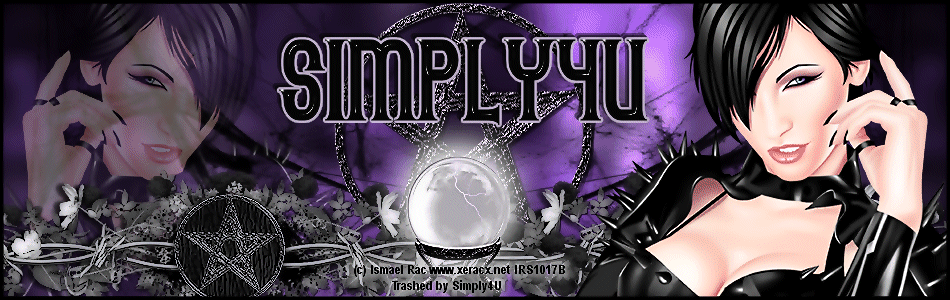
Close Up tube of choice, I am using the work of Ismael Rac
His artwork requires a license to use, you can get the tube and license HERE
Font of Choice, I am using Honey Script
Mask of choice


Effects:

Eye Candy, Gradient Glow
Eye Candy, HSB Noise
Eye Candy 5, Nature, Fire
Zero, Constellation


Okay, Let's Get Started

Open Vaybs's template in PSP, delete the credits layer
Image, Canvas Size, 800 X 700 (we can crop and resize later)
Activate bottom background layer and floodfill white to fill in
Copy and paste a paper of choice from the kit
Layers, Load/Save Mask, Apply Mask of choice
Adjust, Blur, Gaussian Blur, 10
Effects, Eye Candy, HSB Noise, move both bottom slider 3/4 the way up to marker, Apply
Layers, Duplicate and merge down
Effects, Texture Effects, Blinds, default, color white
(Note, I colorized part of my template to match my tube)
Activate the circle layer, Selections, Select All, Float, Defloat
Copy and paste your close up tube of choice, position, Selections, Invert
Hit delete on your keyboard, Add a subtle drop shadow to your tube
Activate your tag layer under the wordart
Effects, Eye Candy, HSB Noise, same settings as before
You can use the wordart as is, colorize it, or delete it and make your own
(I chose to make my own using the Honey Script font, size 28)
If you do your own text, add Effects, Gradient Glow, Color, Medium, White
Add a subtle drop shadow to the text
Copy and paste bow of choice at the top of the picture bulb, see my tag for placement
Copy and paste a ribbon of choice and place at the bottom of your tag
Copy and paste the round candle of choice, postion over the ribbon left side of tag
Layers, Duplicate, Image, Mirror
Copy and paste taper candle of choice as a new layer, place in center at bottom of tag
See my tag as a reference
Copy and paste the holly as a new layer, (I colorized the berries to match my tag)
Position to the left of the center taper candle on ribbon, see my tag for placement
Layers, Duplicate, Image, Mirror
Drop shadow all elements with drop shadow of choice
Add your tag/copyright info
Hide your white background layer
Activate any other layer and Layers, Merge, Merge Visible
Layers, Duplicate
On the bottom layer, change the Layer Properties to Darken, Adjust, Blur, Gaussian Blur, 10
Unhide your white background layer
Layers, Merge, Merge Visible
If you do not wish to animate, you can save your file as a png file and you are done

Animation:

Layers, Duplicate for a total of 3 layers
Using your magic wand tool, click on the snowflakes on the bow and the round candles, carefully
Make sure you only have the white part selected
On your first layer, Effects, Xenofex 2, Constellation, 
Settings, Low Density Stars, 2.00, 85, 4, 4, 61, 35, Keep original image checked, apply
Repeat for the other two layers, making sure to hit random seed again on each layer, Deselect
Activate your first layer again, Using your magic wand tool again,
Click on the flame of each of your 3 candles, make sure to select all the flame
Effects, Eye Candy Nature, Fire, Settings, Small Candle, Direction 90, 30, 92, -2, 0, 25, 100, 20
Start from bottom checked, Apply
Repeat for the other 2 layers, making sure to hit random seed again on each layer
Activate your first layer, Edit, Copy and paste into Animation Shop as a new animation
Back in psp, Activate your second layer, Edit, Copy and paste into AS after current frame
Back in psp, Activate your third layer, Edit, Copy and paste into AS after current frame
Animation, View animation, if happy with your tag, save as a gif file and you are all done!!

I hope you enjoyed my tutorial and if you make a tag with it, please send it to me so I can show it off here!
Thanks for stopping by!!


FTU TUTORIAL - BABY IT'S COLD OUTSIDE


I wrote this tutorial for those with a working knowledge of psp
Any resemblance to any other tutorial is purely coincidental


Supplies:

Absolutely gorgeous freebie kit Northern Light by Vaybs, which you can get HERE
Tube of choice, I am using the beautiful artwork of Barbara Jensen, 
which requires a license to use. You can purchase the tube and license HERE
Font of choice, I used Santa's Sleigh Full
Winter Background scene of choice
Mask of choice


Effects:

3D Effects, Inner Bevel
Vanderlee - Snowflakes
Eye Candy 5, Gradient Glow
Eye Candy 5, Nature, Snow Drift (Optional)
Zero - Improver (Optional)


Okay, Lets Get Started!!

Open a new canvas in PSP, 700 x 700, floodfill white
(Note, I colorized my elements, paper to match my tube)
Copy and paste a paper of choice from the kit
Layers, Load/Save Mask, apply mask of choice
Copy the snowflakes element and paste as a new layer,
postion at the top left of your tag, Layers, Duplicate Layer, Image, Mirror
Merge these two layers together, Layers, Duplicate Layer, Image, Flip

Copy and paste the tree as a new layer, Layers, Duplicate Layer
Position trees in the center of your tag with the leaves touching
so that you have an archway beneath them, see my tag for reference

Copy and paste the bridge as a new layer, postion at the bottom of the tag
just below the archway of the trees, see my tag for reference

Copy and paste a winter background scene of choice, 
erase any part that shows outside the archway,see my tag for reference.
Copy and paste the sign as a new layer and postion to the right of the bridge

Effects, Eye Candy 5, Nature, Snow Drift, Settings, Text 100pt, light dusting

Copy and paste your tube as a new layer
Using your preset shape tool, rectangle, fill color set match kit or tube, stroke, 0
Draw out a rectangle along the bottom of your tag above your tube, see my tag for reference
Add texture of choice, whatever looks best to you
Effects, Eye Candy, Gradient Glow, Fat, 3, 25, 100
Add your text, I chose to add the text "Baby, It's Cold Outside" using a dark color from my tube.
Effects, 3D effects, Inner Bevel, Bevel 2, 30, 16, 4, 10, 6, color white, 315, 35, 30
Effects, Eye Candy, Gradient Glow, same as before.

Add "I Love Winter" to your sign if desired, if you use the same font, size 15.
See my tag for reference
Add your copyright/tag info

Hide your tube, rectangle, wordart on rectangle layers. 
Activate your bottom layer, Layers, Merge Visible
Effects, Zero, Improver
Set your foreground to a medium color from your tag
Selections, Select All, Modify, Selection Borders, Inside, Anti-Alias checked, 5
Layers, New Raster Layer, Floodfill with chosen color 
Apply, Effects, 3D Effects, Inner Bevel, same settings as before 
Deselect, merge down

Layers, Duplicate this bottom layer 2 times for a total of 3 layers
Using your freehand selection tool (Lasso), draw around the center of your tag 
making sure to get all the colored areas inside your circle
Effects, Vanderlee, Snowflakes, 30, 0, 20, 60, 0, Basic Snow, 200, Apply
Repeat for the second layer changing random seed to 400
Repeat for the third layer changing the reandom seed to 600
Add dropshadow of choice to your tube, rectangle, text and elements
Crop Tool, Click on Merged Opaque (end of presets toolbar), 
click check mark at front of presets toolbar 
(This will ensure all the unwanted excess is erased from your tag)


Animation:

Copy the first snow layer and paste into Animation Shop as a new animation
Back to PSP, copy the second snow layer and paste into AS after current frame
Back to PSP, copy the third snow layer and paste into AS after current frame
Edit, Propagate paste checked, Select All
Back to PSP, hide your 3 snow layers
Activate your tube layer, Layers, Merge Visible
Copy and paste into AS as a new animation
Edit, Copy and paste into selection of your snow animation layers
Position rectangle bottom, center making sure it overlaps the bottom of the bridge
Animation, View Animation, if happy, save as a gif file and you are done!
Thank you for trying my tutorial. I hope you had fun
If you make a tag with it, send it to me and I will post it here

Saturday, November 27, 2010

FTU TUTORIAL - DARK XMAS


Supplies:

Gorgeous Freebie Kit Dark Xmas by Vaybs, which you can download Here
I am using artwork by Ismael Rac, which requires a license to use. 
You can purchase the tube and license Here


Effects:
Eye Candy 5, Nature, Fire
Zero - Porcelain (Optional)
Zero - Improver (Optional)
Xenofex 2, Constellation (Optional)
Filters Unlimited 2.0, Color Filters, Greyscale (Optional)


Open a new image, 800 X 700, floodfill black
Copy and paste element 10 as a new layer, Image, Flip, Layer, Duplicate, Image, Mirror
Adjust, Blur, Gaussian Blur, 10, Effects, Texture Effects, Blinds, Color White, 7, 72, horizontal
Copy and paste element 31 on as a new layer, postion to the top left of tag, 
Layer, Duplicate, Image, Mirror
Merge down, Layer, Duplicate, Image, Mirror, Merge down.
Copy and paste frame 2 as a new layer.
Click inside the frame using your magic wand.
Selections, Modify, Expand by 3.
Layer, New Raster Layer
Fill with light color (I used a silver gradient), selections, invert, hit delete on your keyboard
Move under your frame layer.
DO NOT DESELECT!!
Copy and paste a close up of your tube, postion where you want it, hit delete on your keyboard.
On your close up tube layer, Effects, Zero, Porcelian, 50, 128, 128, 0, 0, 0.
Adjust, Brightness and Contrast, Clarify, 1.
Back to your gradient filled layer beneath your tube, 
Add any texture effect that you want...whatever looks best to you.
Copy and paste the fireplace from the kit, resize to fit and position on the bottom 
slightly left of the center of your tag, see my tag for reference.
Copy and paste element 25 (round black candle) as a new layer, resize, Layer, 
Duplicate 2 times for a total of 3 candles
postion the candles on the top of the fireplace, merge these 3 layers together. 
Adjust, Brightness & Contrast, Clarify, 1.
Copy and paste your main tube as a new layer, 
Effects, Filters, Unlimited, Color Filters, Greyscale (optional), 
Zero Porcelain, same setting as before, Brightness & Contrast, Clarify, 1.
Add any other elements of choice, see my tag for the ones I added 
( I used Filters Unlimited, Greyscale to change the color of some elements). 
Resize and postion elements as desired
Drop shadow your tube and all elements with drop shadow of choice. 
Merge visible, Zero, Improver, 9, 30, 9
Image, Add Borders, 4, light grey, Image, Add Borders, 4, black.
Using your magic wand click on the light grey border and floodfill with color of choice, 
I used my silver gradient.
Add your name and copyright info, Layers, Merge Visible.
If you do not wish to animate, save your image as a png file and you are done.

Animation:

Duplicate your image 2 times for a total of 3 layers. Using your lasso (freehand selection tool), draw around the bottom of the fire inside your fireplace.
On your first layer, Effects, Eye Candy 5 Nature, Fire, Settings on small gas log fire,
 basic settings, make sure start from bottom is checked,
you can set your column length and flame width to what looks best for you, apply.
Repeat for the other two layers, but click random seed a couple of times to change effect 
on each layer before applying. Deselect.
Activate your top layer again. Using your magic wand click on the flame of each of your round black candles, make sure all the flames are selected
Effects, Eye Candy 5 Nature, Fire, Settings, Small Candle, 
make sure start from bottom is checked
Basic 30.00, 100, 0, 0, 25, 100, 39, Apply.
Repeat for the other 2 layers, making sure to hit random seed a couple of times 
on each layer before applying.
If you wish to add a slight glitter to your tag, Activate your first layer, 
Effects, Xenofex 2, Constellation
Settings, Low Density Stars, 2, 85, 3, 0, 61, 35, Rotation 45, Keep original image checked. Apply
Repeat for the other 2 layers, making sure to hit the random seed button 
a couple of times before applying.
Activate your first layer again, Edit, Copy and paste into Animation Shop as a new animation.
Back in PSP, Activate layer 2, Edit, Copy and paste into AS after current frame
Back in PSP, Activate layer 3, Edit, Copy and paste into AS after current frame
Edit, Select All, Animation, Frame Properties, 17, apply.
If you wish to resize your tag, you can do so now. Aniamtion, Resize Animation 
(I resized mine to 600)
View Animation, if happy, save your tag as a gif file and you are finished!
I hope you enjoyed my tutorial. Thank you!
Leave me a note and/or send me your finished tag and I will post it here.

Thursday, November 4, 2010

FTU Tutorial - Thanksgiving Blessings


This tutorial was written for those with a working knowledge of PSP

Supplies:

Download HERE

Effects:

Eye Candy 4000, HSB Noise, Gradient Glow
Filters Unlimited 2.0

I am using the artwork of Keith Garvey. Do not use his artwork without a license. 
You can purchase a license and this tube HERE


Okay, Let's Get Started


Download and open my thanksgiving 1_2 template in PSP.

Image, Canvas size 800 X 700 (you can resize later)

Delete my template info layer.

Delete the Background layer.

Layers, New Raster Layer, Layers, Arrange, send to bottom.

Choosing two colors from your tube, floodfill with a foreground/background gradient of choice.

Layers, Load/Save Mask, add mask of choice, Merge group

Highlight the Gray Rectangle layer, Selections, Select All, Float, Defloat.

Layers, New Raster Layer, Floodfill with a light color from your tube.

Deselect, Delete the original Gray Rectangle Layer.

Activate your Black Rectangle Layer, Selections, Select All, Float, Defloat.

Layers, New Raster Layer, Floodfill with the same gradient you used for the mask layer.

Deselect, Delete original Black Rectangle Layer.

Activate your gradient filled Rectangle Layer again, 

Effects, Eye Candy 4000, HSB Noise, 7, 30, 40, 0, 94.73, 95.46, Smooth Lumps, Seamless Tile checked, Random Seed 1, Apply.

Selections, Select All, Float, Defloat.

Copy and paste a close up of your tube, position to the right of the rectangle (see my tag for reference).

Layers, Duplicate Layer. On The bottom tube layer, Selections, Invert and hit delete on your keyboard. Deselect.

On the top layer, add drop shadow of choice, then using your freehand selections tool, remove the right side and bottom of the tube excess outside the 

gradient filled rectangle (see my tag for reference).

Activate your Gray Circle Layer, Selections, Select All, Float, Defloat, Layers, New Raster Layer, Floodfill with grandient.

Effects, Eye Candy 400, HSB Noise, same setting as before.

Selections, Select All, Float, Defloat, Copy and paste your tube as a new layer, postion where you want it in the circle.

Selections, Invert, hit delete on your keyboard. Change the Opacity to around 40%.

Activate your Thanksgiving wordart layer, Effects, Eye Candy 4000, Gradient Glow, 3, 0, 100 

Color settings, Fat, Chose any light color from your tube (I chose a color from the earrings on my tube).

Effects, 3D Effects, Inner Bevel, Color White, Default settings, Effects, Sharpen, Add Drop Shadow of choice.

Activate your Blessings wordart layer, Selections, Select All, Float, Defloat, Layers, New Raster Layer

Floodfill this layer with the same color you used for your glow on the Thanksgiving wordart. Deselect.

Delete the original Blessings wordart layer.

Effects, Filters Unlimited 2.0, Color Filters, Color Booster, Apply. Add more Drop Shadow of choice.

Add any embellishments that you would like including the turkey included in my supplies.

Add drop shadow of choice to elements.

Layers, Merge, Merge Visible

Crop Tool (side panel), Merged Opaque (end of top panel), click on checkmark on the left side, top panel.

Add copyright and tag info. 

Save as a png file and you are finished!!

I hope you enjoyed my tutorial, leave me a comment and tell me about it!!


Thanksgiving Template 1_2


Download HERE